✨PTS CLEAR
Advanced Banking Transaction Management System
Operation Title: PTS Clear
Over view: Clear PTS records using uploaded account data
Key Features:
- Upload Excel files with remark
- User can download the existing excel file data with download button
- How to use the PTS Clear Form
- PTS Clear Records table
- PTS view more from the info popup response
- Final Output – PTS Clear Results
List of Figures:
- Figure 3.1 – Search and Refresh
- Figure 3.2 – Upload File Button
- Figure 3.3 – Upload Form Pop-up
- Figure 3.4 – Region Selection
- Figure 3.5 – Download Processed Data
- Figure 3.6 – Upload Date and User Info
- Figure 3.7 – Clear/Failed Status
- Figure 3.8 – File Name and Download Option
- Figure 3.9 – Additional Info Access
- Figure 3.10– Troubleshooting Info
⚡Overview:
In PTS Clear Records, the bank team provides account numbers and account names, which must be copied into an Excel file. The Rover PTS Clear system only accepts Excel files and does not support any other file formats. While uploading, only account numbers are required. After the clearing process, the uploaded data is removed from the system. Any duplicate or invalid account numbers appear in the Failed Records, successfully cleared numbers appear in the Clear Records, and the original numbers are shown in the Response Description for reference.
⚡Introduction:
The PTS Clear system simplifies the management of PTS Excel files by enabling users to upload, track, and download files efficiently. It ensures that admins can identify failed uploads, download existing files, and take action based on upload statuses and case information.
> Functionality:
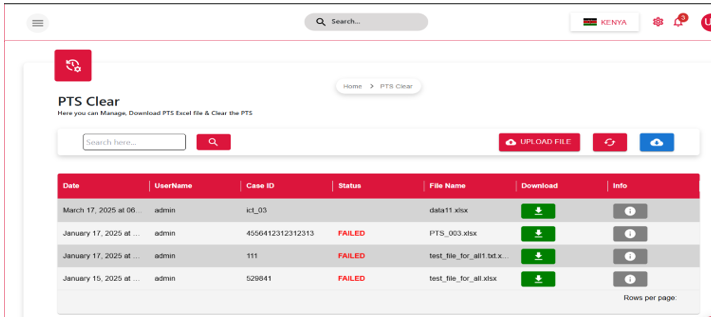
Figure: 3.1
- 1Search Bar: Users can search for specific files by entering text like a case ID or filename. This makes it easier to quickly find the needed file without browsing through the whole list.
- 2Refresh and Sync:
- Red Circular Arrows: Refreshes the table to display the latest updated data.
- Blue Downloaded Arrow: This button lets users download the related Excel file quickly and easily.
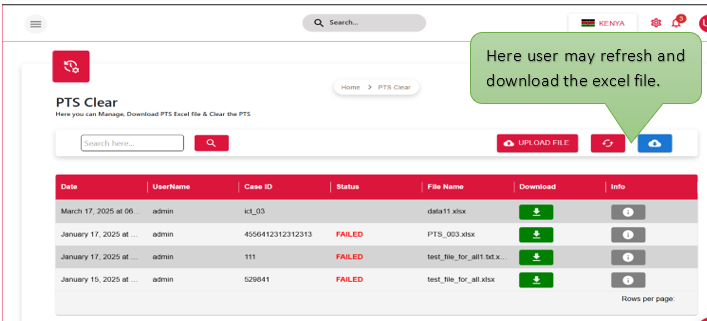
Figure: 3.2
- 3Upload File Button: When the Upload button is clicked, a popup appears prompting the user to enter a Case ID, upload an Excel file, add a remark, and then click the Submit button.
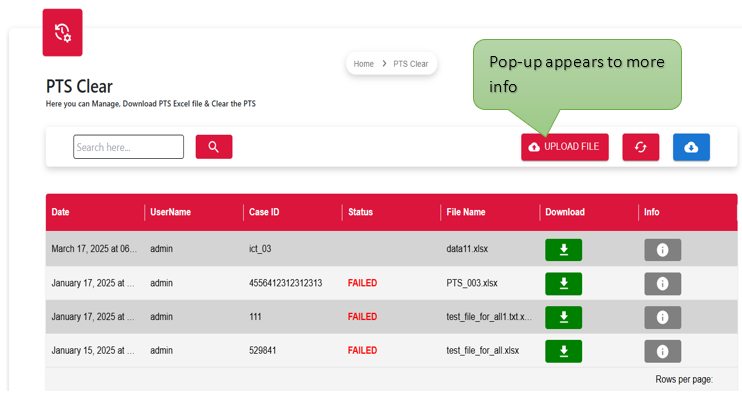
Figure: 3.3
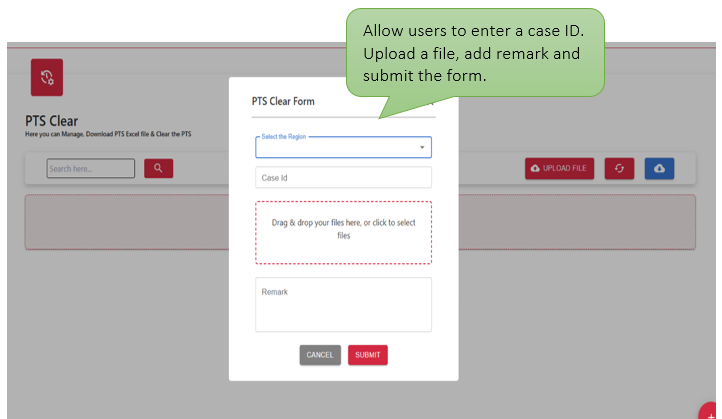
Figure: 3.4
How to use the PTS Clear Form?
NOTE: opening the PTS Clear form, users must select the region from navbar
➤ Here region selection is optional, but mandatory selections must be made on the PTS clear form page shown in the fig-3.4.
- The user may enter a specific Case ID and select the desired region in the designated field or slot.
- The user can upload a file or Excel sheet in the designated field, ensuring it is correctly placed for processing.
- At last, enter a remark and Submit the form.
Figure: 3.5
Download Button: This button allows the user to download the processed data in a structured format, typically as an Excel (.xlsx) file.
- 4PTS Clear Records table:
- Date: Shows the exact date when the file was uploaded, so users can keep track of when files were added and manage different versions easily.
- UserName: This field shows the name or ID of the user who uploaded the file for tracking and accountability.
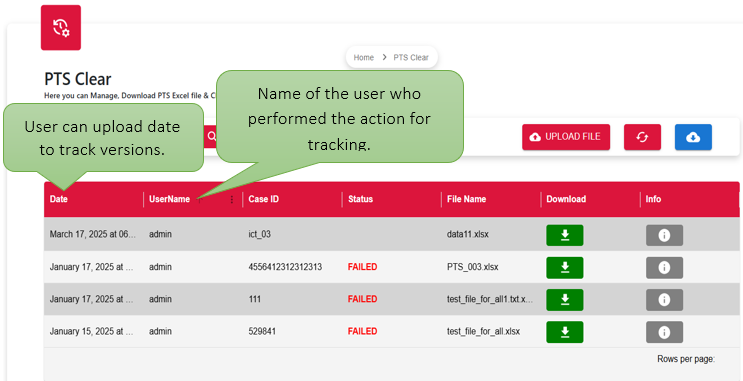
Figure: 3.6
| Field | Description |
|---|---|
| Case ID | A unique identifier linked to each uploaded file to helps to track and reference it easily. |
| Status | Displays if the file was processed successfully or FAILED. Shows the PTS Clear status as either successful or failed after file processing. |
| File Name | Displays the name of the uploaded Excel file for easy user identification and reference. |
| Download | Button that allows users to download the uploaded file for review or record-keeping. |
| Info | Displays additional details or error messages such as No records found, Response Description, Cleared Records, or Failed Records to assist with review and troubleshooting. |
🎯 Final Output:
Once a user is added through the User Management form, their profile appears in the records table with key details such as name, email, assigned roles, and status. Admins can take further actions like editing user information, disabling accounts, or viewing activity logs. The Info section provides in-depth visibility into the user's timeline and T-OTP configuration, supporting secure authentication and auditability. This output ensures clear user tracking, role assignment validation, and secure access control across the system.